Jira On-Premise
If you work with external project management systems such as Jira, you can integrate them with ReleaseOwl.
You can access Jira on-premise with ReleaseOwl.
For this you will first need to follow the steps below to grant Jira access to your servers:
- Enable (whitelist) the requests coming from ReleaseOwl IP address.
- Open port 443 for the ReleaseOwl IP address.
- Allow Jira’s https URL to be accessed by ReleaseOwl’s IP address.
- Create a system user that can access Jira with a username and a password.
Credential Configuration
Create a credential in ReleaseOwl that specifies the URL of a callout endpoint and its required authentication parameters.
Registering Jira
This section is for registering Credentials for Jira.
1. In Administration, go to Credential Manager.
2. In page displayed, click Register Credential.
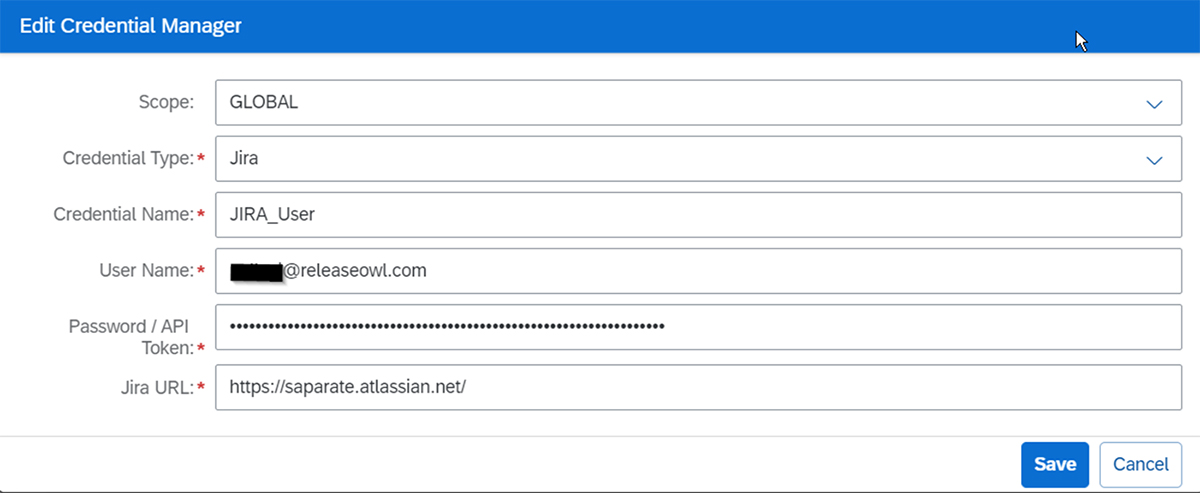
3. Fill in the required details.
| Scope | This is auto- populated |
| Credential Type | Choose Jira from the drop down |
| Credential Name | Enter a Credential Name for your personal reference in ReleaseOwl |
| User Name | Enter your Jira username |
| API Token / Password | Enter your API token for Jira Cloud version and Password for Jira On-Premise version |
| Jira URL | Enter your Jira hosting URL |
4. To generate your API token, go to: https://id.atlassian.com/manage-profile/security/api-tokens
Jira Project Integration
To link Jira Project to ReleaseOwl project, perform the below steps
1. Switch to the working required project and select the Project Settings

2. Go to Integration tab. The following page is displayed.
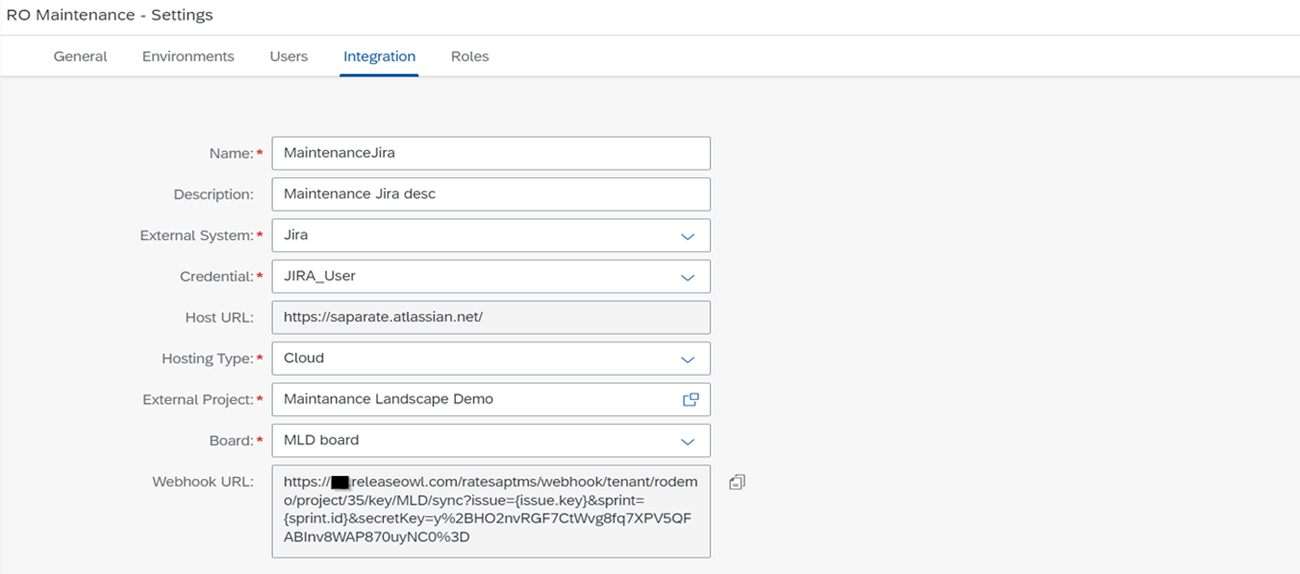
Fill in the required details:
| Name | Name of the Integration |
| Description | A description for the integration, for your reference |
| External System | Select Jira |
| Credential | Select credential for Jira from the dropdown list |
| Host URL | The Jira server URL that you use to access Jira. |
| Hosting Type | Select Cloud. |
| External Project | The pop-up menu will list all the projects running in Jira. Choose the required Jira project to be linked with ReleaseOwl’s Jira Project |
| Board | Select the appropriate sprint’s Kanban or Scrum Board pertaining to the project that you are working with. |
| Webhook URL | This is autogenerated. The generated URL must be placed in Jira to capture any events in Jira user stories, so they are updated accordingly to user stories in ReleaseOwl. |
| Note: Webhook Integration supports the following: 1. Issue: create, update, and delete events 2. Sprint: create and update events |
Further information on registering / configuring webhooks in JIRA can be found @ https://developer.atlassian.com/server/jira/platform/webhooks/
Integrating User Stories from Jira to ReleaseOwl
ReleaseOwl is bidirectional, so the user stories created in Jira can be synced with ReleaseOwl and vice-versa.
To integrate user stories from Jira, follow these steps:
- Navigate to the required Project.
- In Change Management, select User Stories Menu
- Click the Sync User stories icon.
- Once the sync is completed, you will get a pop up saying, User Story Sync completed.
- Click Ok.
